Potato Polymers
Secondary | Materials | Views: 8548
Health and Safety: Ensure to wear safety glasses to protect your eyes, and an apron or some old clothes to protect from spillages. Work with adult supervision.
How will this work?
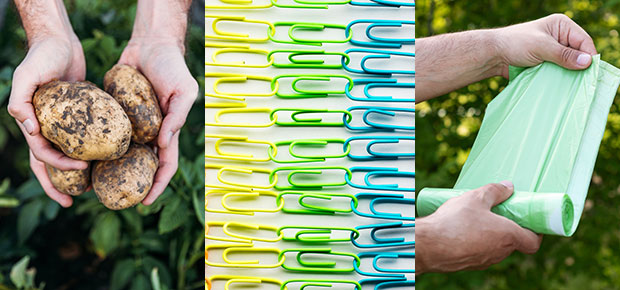
- The plastic is made from the starch in potatoes, which contains glucose – a sugar. The glucose makes long chains, which we call starch. These long chains are called polymers. All plastics have polymers. Watch Dr. Emilia’s demonstration of the polymers in potatoes in the video, which she shows us using paperclips!
- We will use acid (vinegar) to create straight polymer chains.
- The plastic we will make from the potato is called thermoplastic – Why do you think it has this name?
- We will also need a plasticiser (glycerin) to separate the glucose chains and create plastic.
You will Need:
- Potatoes
- Glycerin
- Vinegar
- Food colouring
- Water
- Blender or grater
- Pestle and mortar, or a fork and bowl
- Jar
- Coffee filter or tea strainer
- Utensils (knife, spoon, spatula)
- Pan
- Greaseproof paper
- Cookie cutters or ice cube trays
What to Do:
- Carefully cut each potato (around 200g) into 2-3 pieces and blend.
- Transfer the blended potato to a bowl and add 100ml water. Grind with a fork to extract the starch into the water.
- Put the potato mixture into a filter and let the water fall into the jar. Repeat this process three times. This removes the starch from the potato, which will be in the water.
- Allow the water to rest, and the starch will settle as a white solid at the bottom of the water.
- Without disturbing the solid at the bottom, pour the water at the top of the jar out. This is called decanting.
- Then, add 100ml water to clean the starch and stir well. Let it rest for a few minutes to allow the starch to settle again. Pour off the water once more. Now the starch is ready to use.
Time to make our plastic! You will Need:
- 2 tbsps. starch
- 8 tbsps. water
- 2 tsps. glycerin
- 2 tsps. vinegar
- Food colouring
What to Do:
- Add the water into the jar with the starch and mix well to ensure that all the starch is included in the solution. Do this in halves: add 4 tbsps. water and stir, add to the pan and repeat.
- Transfer this to the pan.
- Add the other ingredients to the pain: vinegar, glycerin and food colouring and mix well.
- Tip: Measure your ingredients over a plate first, to ensure that you don’t accidentally spill or add extra to your mixture.
- Now, we need heat to add all of these elements together. Safely heat the mixture, with adult supervision. Use a very low heat and stir continuously. Stir until the mixture becomes much thicker.
- Once the consistency looks like the video, use a smaller spoon to transfer the plastic to your chosen mould or to greaseproof paper. Be careful, and ask an adult to help, as the mixture will be very hot.
- Allow your plastic to cool and set. This can take at least 1 day.
Enjoy your plastic work! We would love to see what you create! Send an email to askanambassador@canterbury.ac.uk, or tag us on Twitter @STEMHUB_SE or Instagram @thestemhub
« Back